
Let’s take a look at it. They see your product on Instagram and love it. But to buy, they have to leave the app, search for your brand, and browse your website. Somewhere along the way, they quietly disappear.
That friction used to cost sellers thousands of dollars every month. Instagram solved it!
Your store is right inside the Instagram app with an Instagram Shop! Customers can browse, tap, and buy, all without leaving Instagram. Many people already shop this way, discovering products on Instagram and buying them without switching apps.
If you sell any product and do not run an Instagram Shop, you are literally losing real money. This guide will tell exactly how to set one up step by step and how to make it work!
What exactly is an Instagram shop?
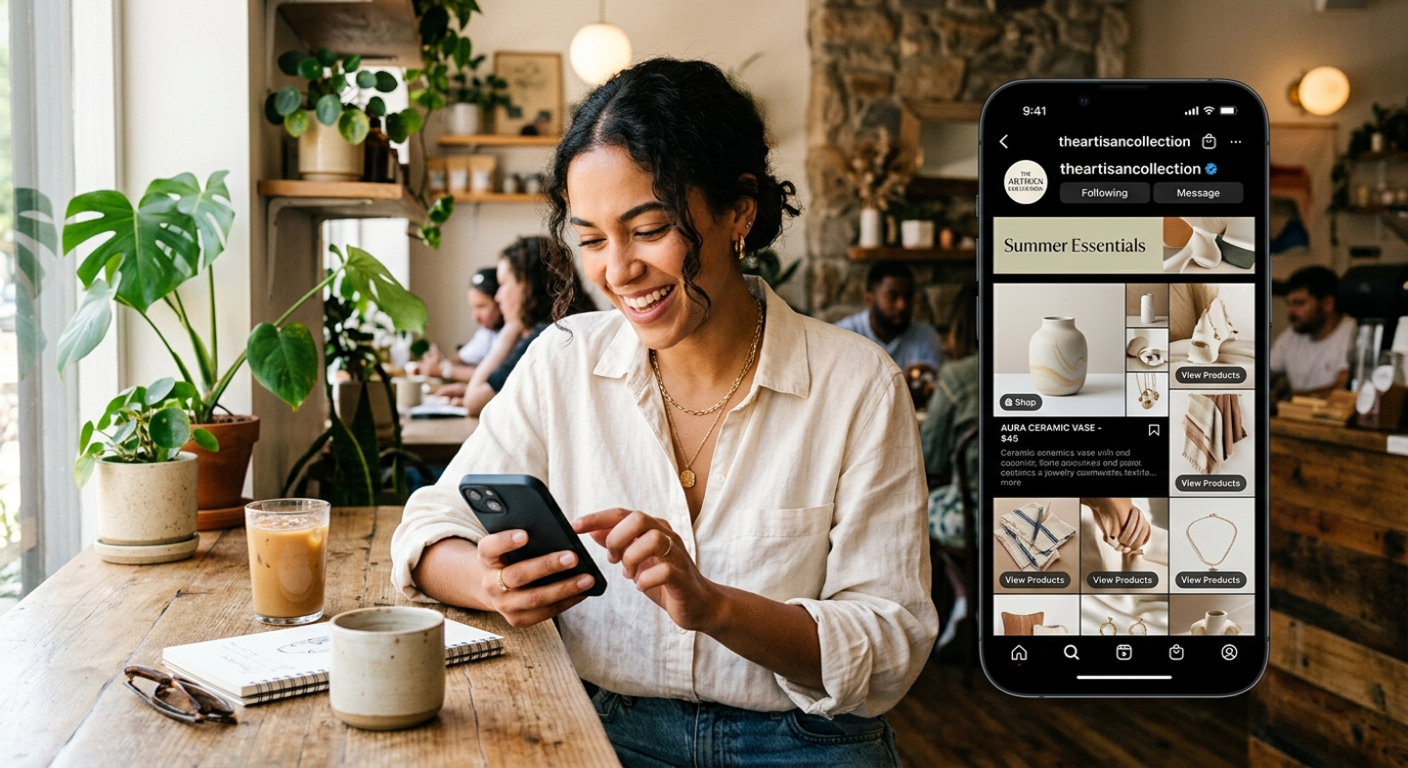
Instagram Shop is a dedicated, inside app storefront integrated directly into your Instagram business profile. Consider it the equivalent of a branded boutique for you, available 24/7, set up at no cost with no need for your customers to use a browser.
View your entire product catalogue
Discover curated collections (think “Summer Picks” or “Under ₹999”)
Click product tags from posts, Reels, and Stories to see details and prices instantly
Check out directly inside Instagram (where available) or land on your website to complete the purchase
It is not just a product list; it is an experience that can be shopped!
Ready to set up? Check your qualification first
Instagram has some requirements before they allow you to set up shop. Here’s what you need:
You need a business or creator account, not a personal one.
You have to have a Facebook Page that is linked to your Instagram account.
Physical products must be available for sale because Instagram Shops do not allow services or digital products.
You should have a website domain that belongs to you since Instagram might require verification.
Your location must be eligible: most countries can access Instagram Shopping, but please check at Meta’s Commerce Eligibility page if yours does too.
You need to agree to Instagram’s Commerce Policies and Merchant Agreement.
If you are checking all those boxes, you are prepared. Let’s create your store.
Here’s the step-by-step setup guide for your Instagram shop
Step 1: Switch to a business account
If you’re using your personal account, then this is your absolutely essential first step to take. Having a business account will give you access to all the tools that you need for selling.
This is how:
Go to your Instagram profile
In the top right corner of your profile, tap the menu icon
Scrolls down and clicks Account type
Switch your account type to a Professional Account
Pick Business instead of Creator, because Creator accounts don’t have full access to Instagram Shopping.
Choose the type of business you have and fill out your contact information.
Finished. You now have an official business account on Instagram.
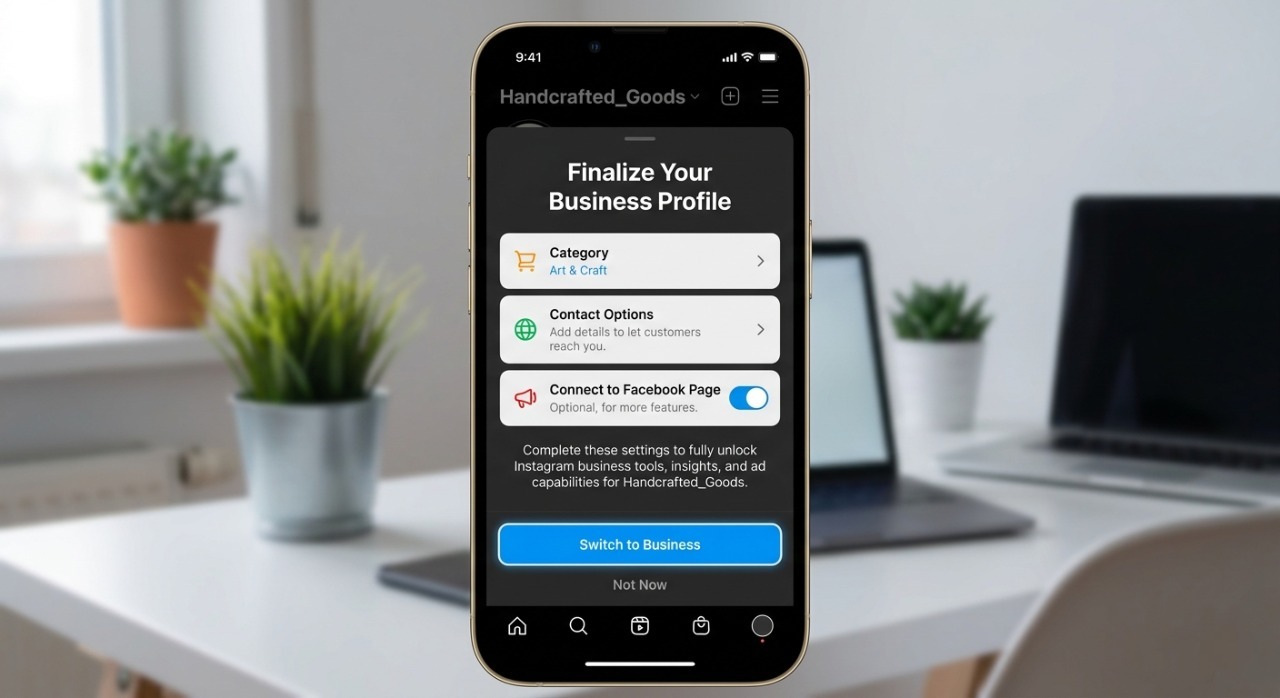
Step 2: Link your Instagram account with the Facebook page
Instagram Shopping is integrated with Meta’s infrastructure, therefore an Instagram account must be linked to a Facebook Business Page before creating a shop. This is essentially Instagram’s method of authentication for businesses.
If you do not yet have a Facebook business page, that is the next step.
Go to your personal Facebook account and log in. You must have a personal account to create a business page, but don’t worry; all of your information will remain private.
Click on the Pages icon in the left-hand navigation or type facebook.com/pages/create into your browser.
Then click Create New Page, and fill out the fields with your business name, category, and description.
Finally, enter your contact details, profile picture, and cover photo!
Click Done when finished. Your Facebook Business Page is set up!
Note: Make sure that the name of this page matches exactly with what people know you as on Instagram for brand recognition across both platforms!
Do you already have a Facebook business page? If so, follow these steps to connect it to Instagram using Meta Business Suite:
Open your web browser and navigate to business.facebook.com
Log in with your personal Facebook account
From the left-hand menu, select Settings.
Under Accounts, select Instagram Accounts.
Click on Add and then Connect Your Instagram Account.
You will be redirected to an Instagram authorization page. Log in to your Instagram account if prompted and click Authorize to grant access
Click Confirm, your Instagram is now connected to your Facebook Business Page within Meta Business Suite.
Note: You need to be an Admin on the Facebook Business Page for this to work. If someone else made the page for you, get them to make you an Admin before starting.
Step 3: Build your product catalogue
Your catalogue is the heart of your Instagram Shop. Every product that you plan to sell must first exist in your catalogue.
There are two options:
Option A: Through Facebook’s Catalogue Manager (The Manual Method)
Click Add Catalogue → Create a Catalogue
Select E-commerce when asked for catalogue type
Manually enter products by providing name, description, price, product link and good quality images
Option B: Sync using Shopify, WooCommerce or BigCommerce (The Recommended Method)
If you have an existing online store, then linking it with your Facebook Commerce Account will automatically sync the catalogue. This will save hours of manual work and keep prices and inventory updated in real-time.
Pro tip: Use clear and bright photos of the products on a white or neutral background; this is because Instagram is mainly visual! Your photo sells first before anyone reads any part of the description.
Step 4: Submit your account for review
Once your catalogue is created, you can apply for Instagram Shopping by following the steps below:
Open the Instagram app and navigate to your Profile.
Tap the button for Professional Dashboard above your bio (or tap ☰ in the top right corner → Settings and Privacy).
Next, go to Settings → Business → Shopping.
Tap on Get Started and follow the prompts.
Select the Product Catalogue that you created in Meta Business Suite.
Finally, tap Submit for Review.
Since reviews are done manually by Instagram, be prepared to wait anywhere from a few days up to two weeks; however, you can check the status of your review at any time by returning to Settings → Business → Shopping.
Note: If Instagram asks you to verify your website domain via Meta’s Business Manager, please do so immediately. This is just a normal process that verifies ownership of the site where your products are directed.
Step 5: Turn on shopping and start tagging products
Once you are approved, Instagram will notify you. Then:
Go to Settings → Business → Shopping
Toggle Shopping features On
Select the catalogue that got approved
Now the fun part begins. Go to any post, Reel, or Story that you are making and hit tag products before it goes out. A tiny product tag that you can tap will show up on your content and when anyone taps it they will see your product name price, and a direct link to buy.
You can tag up to five products in one picture or up to 20 in a carousel post. This is great for selling related items together in one post.
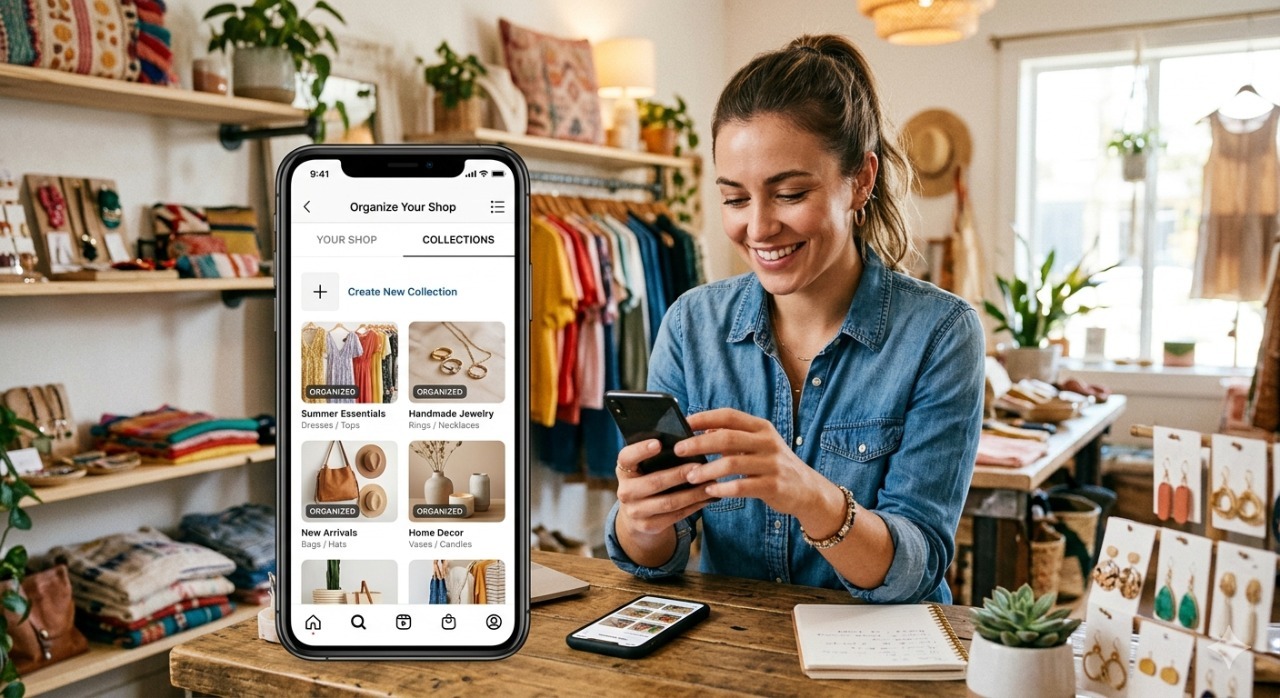
Step 6: Organise the shop with collections
A messy store stops people from buying. That’s what collections are for.
You can think of collections as carefully chosen parts of a store. They guide customers to find what they want faster while helping you showcase your products in an aligned way.
Ideas for collections:
Most Popular
New Items
Trending products
By event (Gifting, Travel, Daily)
By price range (Less than ₹500, Less than ₹1000)
Seasonal changes (Monsoon Essentials, Festival Ready)
To make a collection, go to Commerce Manager → Catalogue → Collections → Create Collection. From there, you can group your products however you want.
Step 7: Know when to use what type of format to drive shop visits
Setting up your shop is half the work. To make sales, you have to bring traffic to your shop on a daily basis with your content.
Use these formats of Instagram strategically:
Feed Posts
Tag products in every post that features a product, including carousel posts. Every caption should have a simple call to action like “Tap the tag to shop. “It’s effective.
Instagram Stories
Stories use the same product-tagging feature as Feed Posts but create urgency since they disappear after 24 hours. Use them for flash sales, new arrivals, and low-stock notifications; a time-limited Story + product tag is an even stronger nudge to buy right now.
Reels
Short-form video is currently Instagram’s highest reach format, and Reels with product tags are an absolute goldmine when it comes to discovery. Show it in action, highlight the problem it solves, or do a quick unboxing. Reels are favored by the algorithm so non-followers can still find their way into your shop!
Instagram Live
Go live and showcase your product without editing. Answer questions, show use cases, and pin those product tags so users can buy while they watch! Shopping lives retain viewers way better than pre-recorded video because people want to stick around and see what happens next.
The little things that kill Instagram shop sales
Even brands with great products lose out on sales because of mistakes they could have avoided. Avoid these things:
Using pictures that aren’t very good. Instagram is the platform with the most pictures. Poor quality photos and messy backgrounds immediately break trust.
Not including descriptions of the products. Your description is your salesperson when someone taps on your product tag. Be clear. Include the size, material, use case, and what makes it unique.
Tagging in a way that isn’t consistent. People can only shop in your store if they can find things to buy in your feed. Tagging products should be a normal part of making content.
Not responding to DMs. People who are interested in your product often DM you before they buy it. If you don’t respond quickly, you’ll lose the sale. Think about setting up automatic replies to common questions about shipping, sizing, or availability, especially when you’re not at work.
Conclusion
Your Instagram Shop works best when it’s active and regularly updated. Unlike a website that might only get refreshed once a year. Add new items, change the themes of your collections to match the seasons, tag items in your newest posts, and use Instagram Insights to see which posts get the most people to visit your store.
Brands with the most money aren’t the ones that are doing well on Instagram right now. They’ve made their content easy to buy, their shop well-organised, and their product story the same in every format.
You have the item. Now go make the store.
Once your Instagram Shop is live, enquiries, requests, and messages start pouring in. Managing them manually isn’t scalable. Agentzee automates your responses, keeps conversations active, and brings customers back to your shop.
Please check out our product